Bitcoin Consulter™
Bitcoin Node
Building A Node
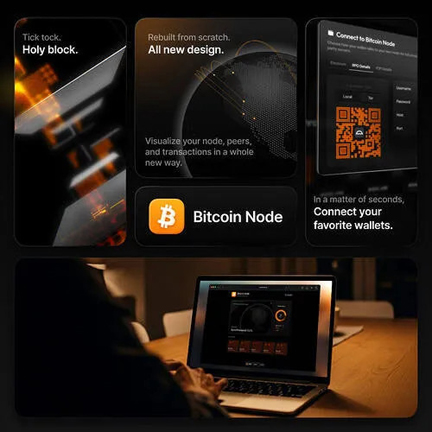
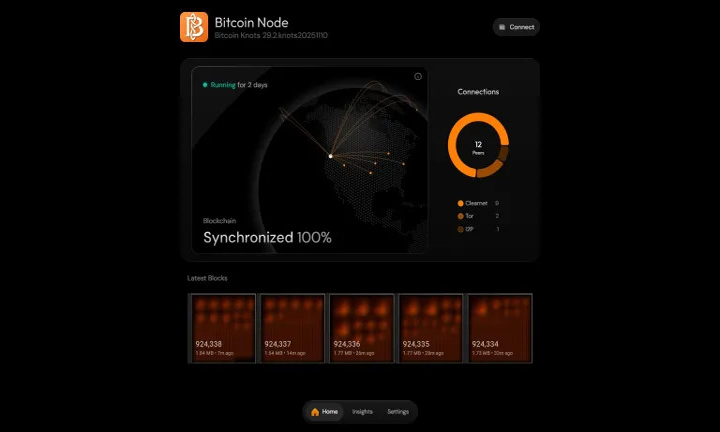
I’m going to show you how to build your very own Umbrel Bitcoin Node Server. By the end, you’ll have something that you can open on your computer that will look like this:
I always like to let people know what they’re getting into before going very far in my articles, so here it is:
- This entire project will definitely cost some money (about $250 USD at time of writing, although you should be able to shop around for something much cheaper and used if you really want to)
- You don’t need to know how to code
- You do need some great computer literacy (installing programs, feeling confident working with SD cards, etc.)
- Once you have the parts (more on that below) you’ll need several hours of time to set everything up
You know I’m all about typing up code to build awesome things, but that’s for another day. This tutorial doesn’t require code because I want everyone to be able to participate!
Bitcoin Node Parts
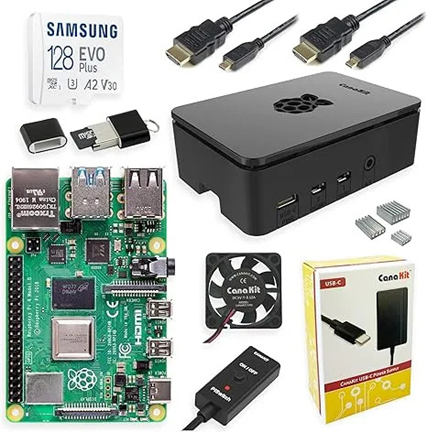
If you don’t have them already, you’ll need two main things — a Raspberry Pi, and an external SSD. Here’s what I recommend:
- Raspberry Pi 5 kit from Amazon ~ -18% $80.79 USD
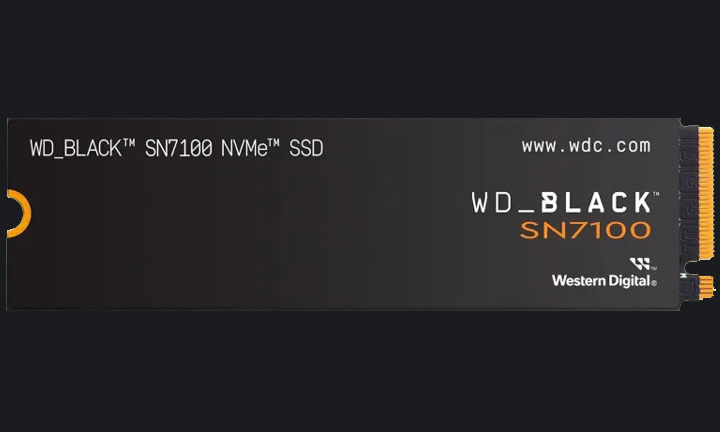
- WD_BLACK 2TB SN7100 NVMe Internal Gaming SSD Solid State Drive – Gen4 PCIe, M.2 2280, Up to 7,250 MB/s – WDS200T4X0E [New Version] ~ -25% $119.99 USD
Those aren’t sponsored links. They’re just recommendations.
We do not write articles that trick you into buying stuff.
Also, as a fairly frugal person myself, I know it’s not fun to spend lots of money.
The great thing about what you’re buying here is that none of these parts are specific to Bitcoin.
Bitcoin Node SSD
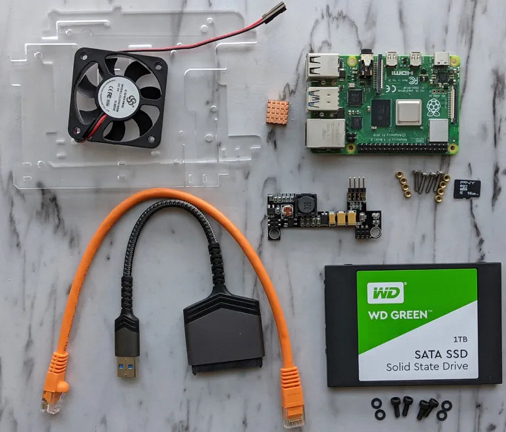
You will need to buy the following parts,
- 2TB or larger SSD (with a USB A-type connection cord)
- Raspberry 4 Pi or Pi 5
- Raspberry 4 Pi or Pi 5 case & fan
- Raspberry 4 Pi or Pi 5 power supply
- Ethernet cable
- 16GB or larger microSD card
Setting Up Hardware
Now that you have the parts you need, there’s nothing standing in the way of getting your Bitcoin node up and running!
If you bought a Raspberry Pi kit, it should have instructions on putting it together. I’ll let you follow those.
The next thing you need to do is make sure your external SSD is formatted the right way. If you don’t, Umbrel (the software we’ll be using to have a nice GUI dashboard for our Bitcoin node) won’t be able to start downloading the Bitcoin blockchain.
If you have a Windows machine, you’ll need to format it for “Ext4” (walkthrough). If you have a Mac, format it for “Fat32” (walkthrough).
Let’s move on to software.
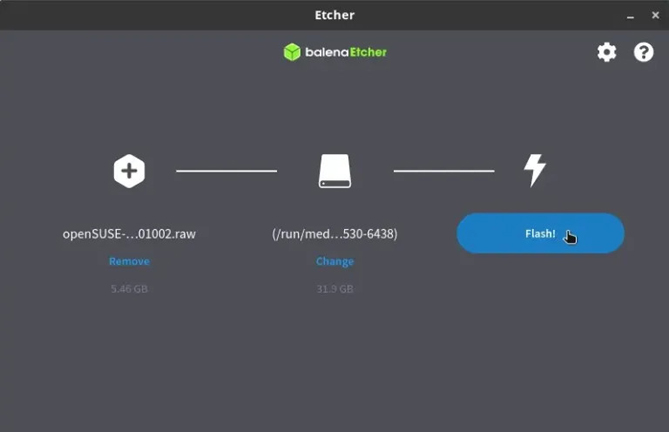
Flashing Software
First, you’ll need to flash Umbrel’s software onto your micro SSD card. To do this, install a SD card flasher like BalenaEtcher (for Mac, Windows, and Linux).
Next, download the most recent version of Umbrel. We’ll be flashing that onto the SD.
Once you have the Umbrel image downloaded, connect your SD card and flash the image to it with BalenaEtcher:
On the first step here, you need to select the .img file that you just downloaded from the Umbrel website. Next, select the target as your SD card. Finally, you can go ahead and flash it!
Connecting Node
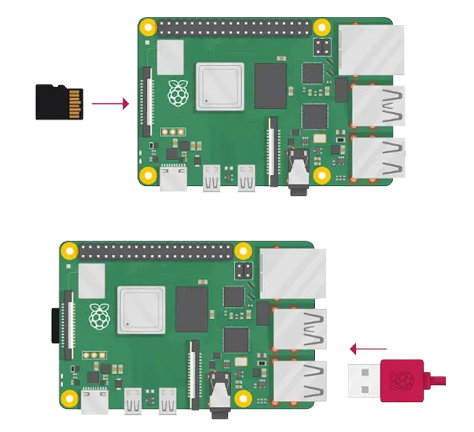
Believe it or not, this is now the easy part if everything is set up correctly. Here are the steps for connecting your Bitcoin node to the network:
- Put your microSD card into the Raspberry Pi port:
- Next, put the Raspberry Pi into its case:
- Plug in the external SSD drive, making sure to use one of the USB 3 ports:
- Connect you Ethernet cable:
- The last thing you do is connect the power cord:
Welcome Page
Now that your bitcoin node is all wired up, you can sit back and just enjoy the rest of this process as Umbrel software does all the work.
Once the Raspberry Pi turns on, Umbrel will automatically boot up from the microSD card and start doing its thing. You should be able to grab your computer and go to http://umbrel.local (your computer needs to be on the same Wifi network as your Bitcoin node).
This is the front-end that will let you interact with your Bitcoin node. When you go there initially, this is likely what you’ll see (as it’s still setting up):
New Account
This could take a while, so don’t worry too much!
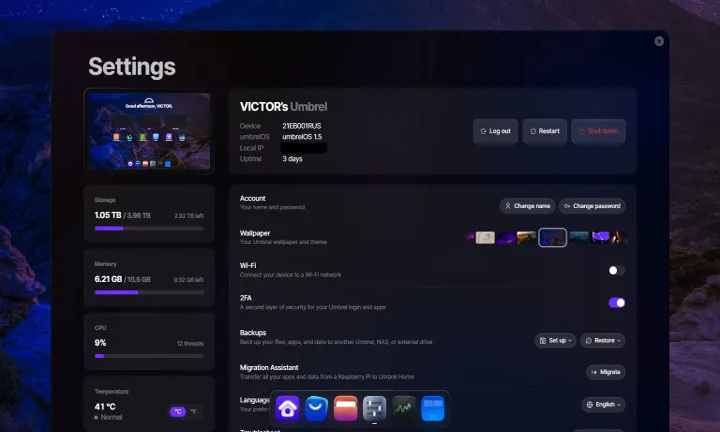
Once the node finally finishes booting up, you should be presented with a setup screen. Go through the flow and create your new account. When you get the chance, try enable 2 factor authentication (2FA) for extra security on your Bitcoin node (with something like Authy or Google Authenticator which you can find on your phone’s app stores).
During normal day-to-day use, this is the login screen that you’ll see when you go to http://umbrel.local:
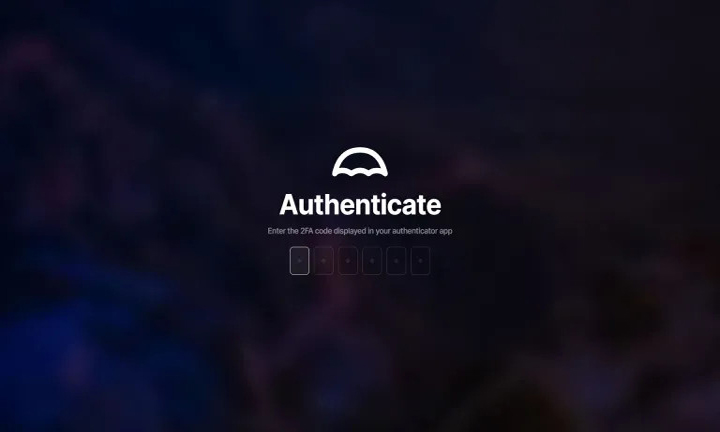
2FA Password
If you enabled 2FA previously, any password login will be followed by a requirement to enter a code for it:
The Download
Once you’re setup with a new account and logged in, you’ll see that your bitcoin node has started downloading the entire Bitcoin Core blockchain and installing it on your external SSD:

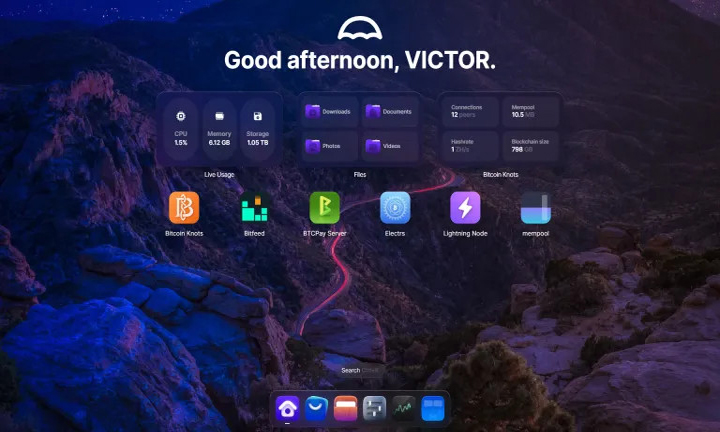
Dashboard
You can also click on the “Bitcoin” tab on the sidebar to see a more detailed breakdown as it’s downloading the blockchain:
1–4 days
It takes from one to six days for this download (sync) to finish depending on internet connection and hardware. However, take heart in that seeing this means that your Bitcoin node works!
Once the download of the blockchain is complete and the node is synchronized, this is what you’ll see:

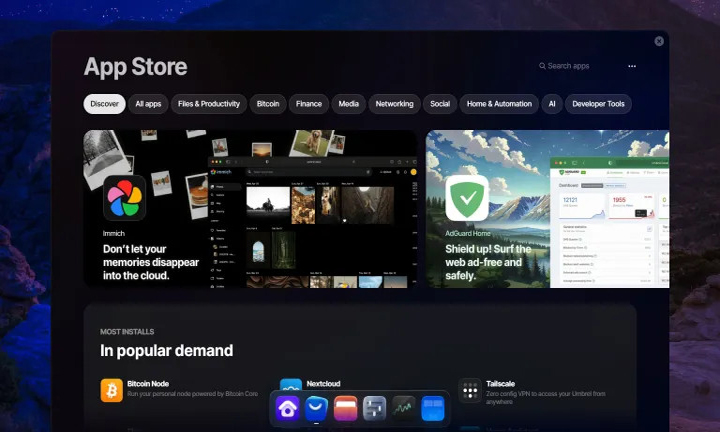
Installing Other Apps
From here, there are all sorts of things you can do with you Bitcoin node (and Umbrel OS) like:
- Start participating in running (and getting paid for) a Lightning network node to help make it cheaper for people to send Bitcoin
- Install some other apps on the Umbrel platform (some of them let you do cool things like watch transactions as they come into the pool for the next Bitcoin block that will be mined)
Here’s a screenshot of just a few of the apps you can install with Umbrel and run alongside your Bitcoin node:
Updates & Installs
- Bitcoin Core to Bitcoin Knots on Umbrel | How to migrate from Core to Knots on Umbrel.
- https://github.com/getumbrel/umbrel/wiki/Install-umbrelOS-on-x86-Systems
- Flash SD: Download Etcher
- Migrate blockchain data (no resync needed): https://docs.mempool.guide/page/migrationumbrel.html
Bitcoin Knots Overview
Bitcoin Knots began in 2011 December as Bitcoin Next-Test, a derivative of Bitcoin Core’s “master” branch with upcoming and proposed features merged in manner as unbiased as possible toward the changes themselves. In 2014, due to time constraints and a desire to maintain a more stable and well-maintained derivative, I began instead to base the branch off the latest stable release, and include only modifications that both looked reasonably safe and I did not personally consider problematic or flawed; along with this change, since it was no longer an unbiased derivative, I renamed it to Bitcoin Core “ljr”, and later Bitcoin LJR.
With 0.12 in 2016, the project was once again renamed (to “Bitcoin Knots”) and has a goal of being a general enhanced derivative of the reference Bitcoin Core software.
@LukeDashjr Bitcoin Core developer, and CTO @OCEAN_mining; INTP

Conclusion
Congrats. You just built your very own Bitcoin node!
I hope you’ve enjoyed this guide and come away with some new knowledge. Doing small projects like this is super fun and gets you involved with a global community of enthusiasts.
Ready to take meaningful control of your Bitcoin future? We’re here to guide you every step of the way.
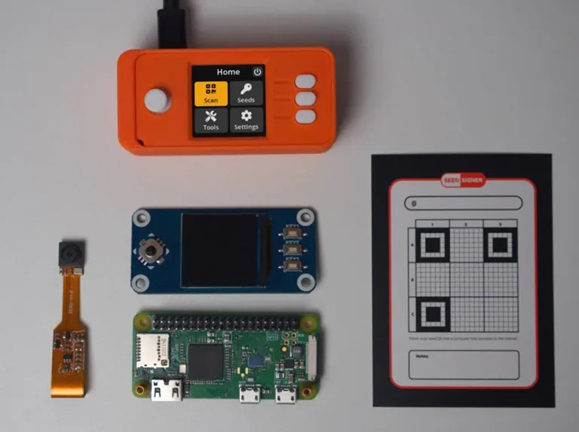
Build A SeedSigner
Imagine a world where self custody of Bitcoin is outlawed. This video demonstrates how to assemble and use a DIY Bitcoin wallet, the Seed Signer, ensuring you are ready to safeguard your Bitcoin when hardware wallets are banned. The tutorial covers generating new seeds, exploring addresses, and verifying them, and preparing users for a hypothetical future where bitcoin self custody might be restricted.
LINKS –
- Get a SeedSigner kit https://btc-hardware-solutions.square… OR https://sovereignhardware.ca/
- -Parts list https://github.com/SeedSigner/seedsig…
- -Seedsigner Website https://seedsigner.com/
- -Balena Etcher Download https://etcher.balena.io/
- -Printable SeedQRs https://github.com/SeedSigner/seedsig…

Ready for Full Sovereignty?
Bitcoin belongs to everyone. Claim yours securely — no banks, no middlemen.
Start now.
Bitcoin Consulter™
Bitcoin Consulter™ offers training, support, and best practices to help independent Bitcoiners worldwide strengthen their sovereignty and navigate their Bitcoin journey.
FREE BITCOIN ART
Subscribe — stay ahead with BTC news, deals & new lessons.
Next Bitcoin Halving
Expected ~ April 2028
(Block reward: 3.125 → 1.5625 BTC)
Established @ Block Height : 449,049
©2026 Bitcoin Consulter™ - Privacy | Terms